Published by Matt Fichera on 03/22/2021
How to Install a Maytronics Dolphin Conversion Kit
Maytronics manufactures a few different model conversion kits for their robotic swimming pool cleaners. These conversion kits allow the robot’s filtration system to be changed from a bag filter to a cartridge filter, or the reverse, and change it from the cartridge filter to the bag filter.
Utilizing a conversion kit allows you the ability to switch back and forth as you desire. Some people think that the filter bag holds more debris which could be more convenient at the beginning of the year during pool opening and then switch to the cartridges during the season as they are proficient at picking up the finer debris and help get your pool to that absolutely pristine mid-summer look and feel.
Maytronics makes a few different conversion kits and the one that will work for you will depend on the size as well as what you are converting to and from.
The 9991412-R1 conversion kit works with these robotic pool cleaners:
Dolphin DX3, Dolphin DX4, Dolphin DLX3, Dolphin Orion, Dolphin Atlantis, Dolphin Saturn, Dolphin Apollo, Dolphin Apollo Plus, Dolphin Primal, Dolphin Neptune, Dolphin Neptune Plus, Dolphin H50, Dolphin Advantage Plus, Dolphin Endeavor
The 99954305-RK1 conversion kit works with these robotic pool cleaners:
Dolphin Edge, Nautilus, Triton, Quest, Premier, Deluxe 4 and 5, DX6, Discovery, Wave 75, Prowler 820/830
The 9991414-R1 Conversion Kit work with these robotic pool cleaners:
Dolphin Deluxe 4 and 5, DX6, Discovery, Quest, Edge, Triton, Wave 75, Prowler 820, Prowler 830, Premier Pool Cleaners
This conversion kit being used in this product video is manufacturer number 999-54305.
Upon opening the box, the kit comes with a filter screen, a bag, two clips to hold the bag on, two screws for the filter screen, and one bottom tray.
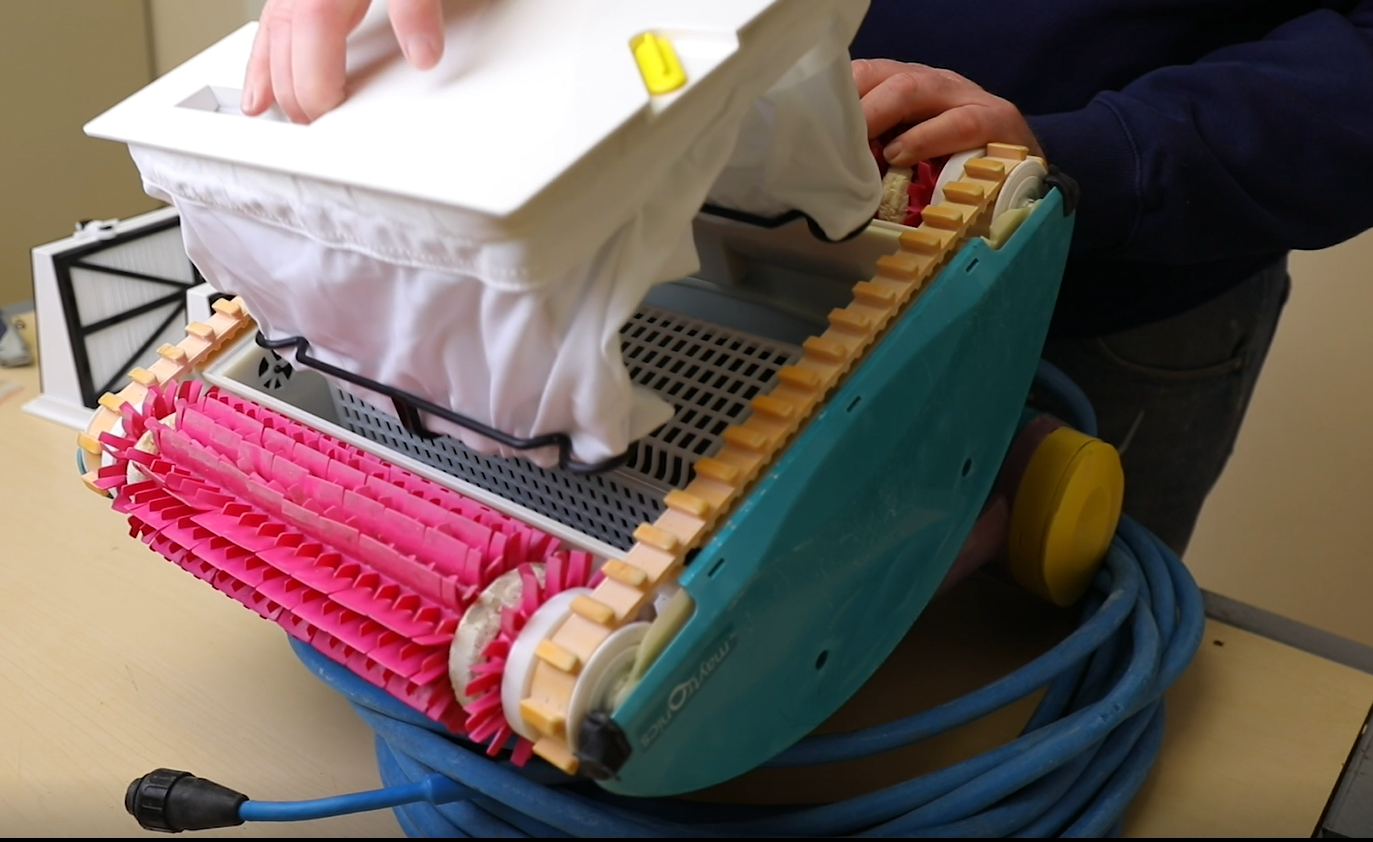
The first thing to do is put your bag on. Located in the middle of the bag is a strip, which should be placed in the middle. Put the bag onto the tray one side at a time. As the bag fits on to the bottom tray it’s going to stretch and it may even feel like it’s going to break. This bag is designed -for a tight fit and you will want to secure it at all four corners by snapping it down.
With the bottom tray down and the bag now secure and facing up, it’s almost like making a bed, take each of the four corners and place them securely onto the tray. The clips come in handy to keep the bag centered. This comes more into play when the bag is brand new. After a while you may not need the clips.
Next up is the filter screen. The filter screen keeps the bag from being caught in the impeller and possibly causing damage. Take out the filter tray, on this model that’s done by turning the tabs on the under side of the robot and lifting the filter tray out. The filter screen is then placed over the motor. Locate the grooves on the inside of the robot body where the screen is able to slide into. After sliding the screen into the grooves, it is secured by using the two screws, one on each side.

Take the previously prepared tray and bag and double check to make sure that it’s secured using the clips. Turn it upside down and place it back inside the robot, securing it using the tabs on the exterior again.
This change-out can actually work both from a filter to a bag and a bag to a filter. It’s very important if there is any confusion or questions on the correct kit, or what may work for your model, go ahead and contact us. We may ask for your robot’s serial number to help ensure the right kit for the job. The serial number is usually located on the inside of the body or sometimes on the motor.
At E-Z Test Pool Supplies we only carry 100% Genuine OEM Maytronics Dolphin parts. To keep your robot optimized and to prolong its life, don’t accept generic parts into your machine.


