 and Active Brush Gears")
How to Replace a Maytronics Hex Pin (Drive Shaft) and Active Brush Gears
Published by Matt Fichera on 03/19/2021
Posted in: Robotic Pool Cleaners
A hexagonal pin or “hex pin” is a very important part of how your robotic pool cleaner operates. It is the physical connect between the drive motor and the pulley or pulleys that are responsible for turning the robot’s tracks so that it can move. These pins could get lost if you have the robot apart and you will need to order a new one as the robot will not run without it.


Replacing the robot’s hex pin involves taking the side plate off using a screw driver to remove the screws holding it in place. You can then lift the track up over one of the guide wheels using the screwdriver for leverage if it’s needed. Next up, remove the guide wheels and the pulley itself. At this point you will want to see if there is a hex pin inside of the pulley upon removing it.

Behind the space where the pulley is located is the drive motor. The pulley is turned by the hex pin that connects the two. The pin has a notch on one side that fits right across the motor while the other side is hexagonal in shape and corresponds to the hexagonal shaped connection located on one side of the pulley itself. On robots with dual drive motors there is a hex pin on both sides but for single drive robots it’s only one. This is dependent on the functionality of the robot.
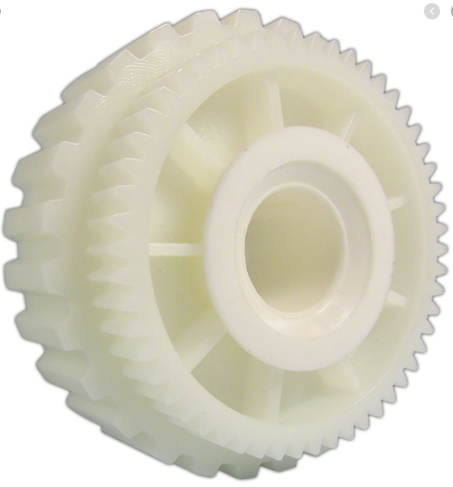
This robot that we’re using in the video also has what is called an active brush. This is an extra gear which needs to be connected at the same time as the pulley with the hex pin. Connect these so that the extra brush on the underside of the robot moves at the same time as the others. The active brush gear also gets locked down by a small cover. This cover has two teeth which fit onto each side. To ensure this cover is locked securely into place, use the butt end of the screwdriver and give it a few taps.
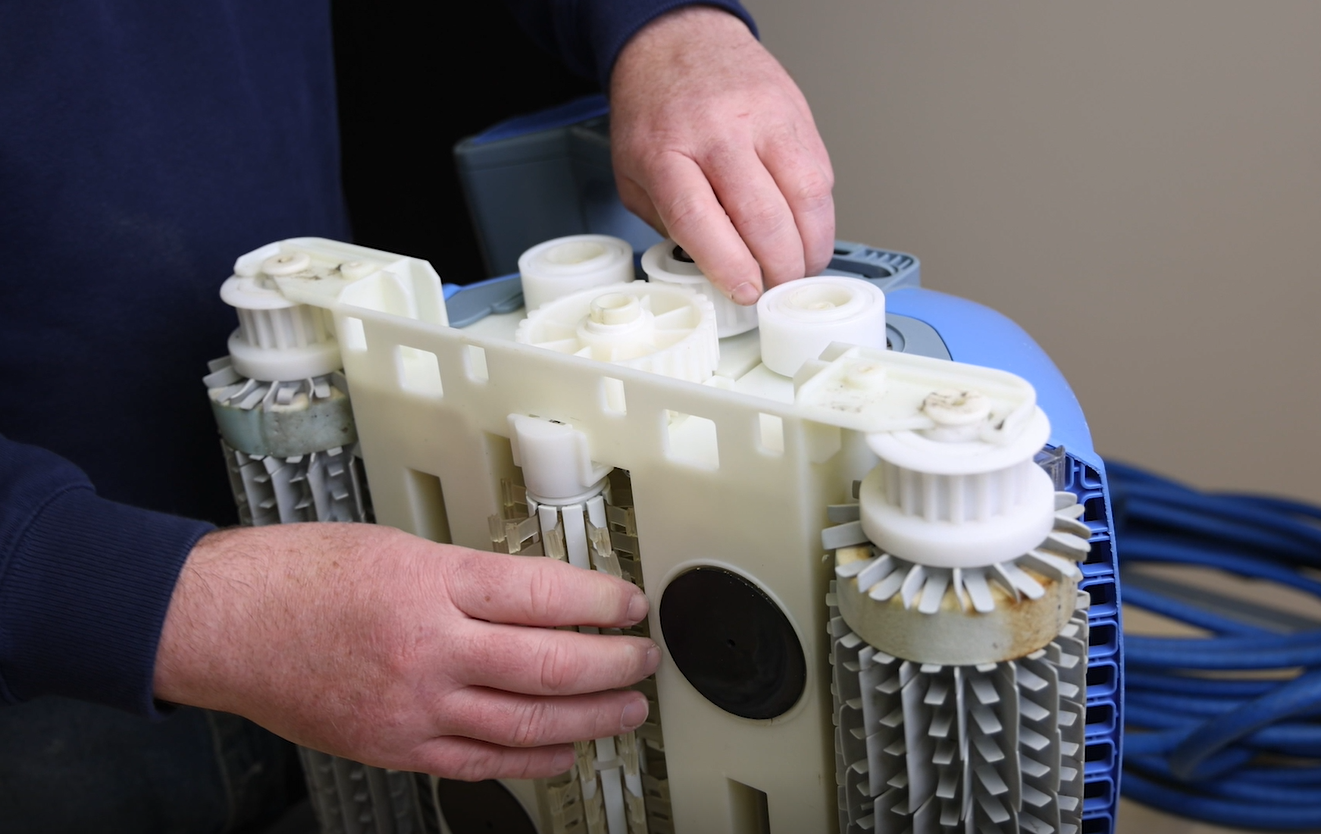
At this point you can reassemble the robot making sure that the guide wheels and pulley are secured. Re align the track and reattach on the rollers first then go right up over the pulley located in the middle. Make sure you thread the track back in between and under each guide wheel as well. Securing the track under the second guide wheel could be a bit tricky as the track could be tight. If this is the case, go ahead and use the screwdriver as a lever and brace against the closest guide wheel. This is meant to be very tight especially if the tracks are new. Lastly, line up the side plate with the holes inside of each guide wheel then you can strike it firmly and lock it into place. Do this first on the bottom and then secondly up by the guide wheels.
We are a Maytronics Certified Genuine Parts dealer. Genuine parts are what you always want to go with to keep your pool cleaner in its best condition. We have an on-staff robotic technician as well as a team of professionals who have many years of robotic pool cleaner experience. We would be happy to help advise and answer any questions that you may have. Visit our product page link in the description to purchase the hex pin or the active brush gear as well as many other parts.