
How to Replace Maytronics Dolphin Guide Wheels
Published by Matt Fichera on 03/22/2021
Posted in: Robotic Pool Cleaners
Your Dolphin / Maytronics robotic pool cleaner is a reliable work horse. It has been cleaning your pool effectively for years, but maybe you are starting to notice that it isn’t moving quite as good as it once was and not completing the cleaning job as good as it once did.
The issue could very well be worn out guide wheels and pulleys causing the robot’s track to slip and work at less than full power. These parts do in fact need to be replaced every once in a while.
E-Z Test Pool Supplies sells these guide wheels and pulleys in the following quantities:
Maytronics / Dolphin replacement guide wheels and pulley gears work with the following robotic pool cleaners:
We will also show you how to change out these guide wheels and pulleys quickly and efficiently. The robot that we are working with here has the tracks, gears, and pulleys accessible on the outside. There are some robot models that require you to take the top housing off in order to access the side plate which adds an extra step to this process.
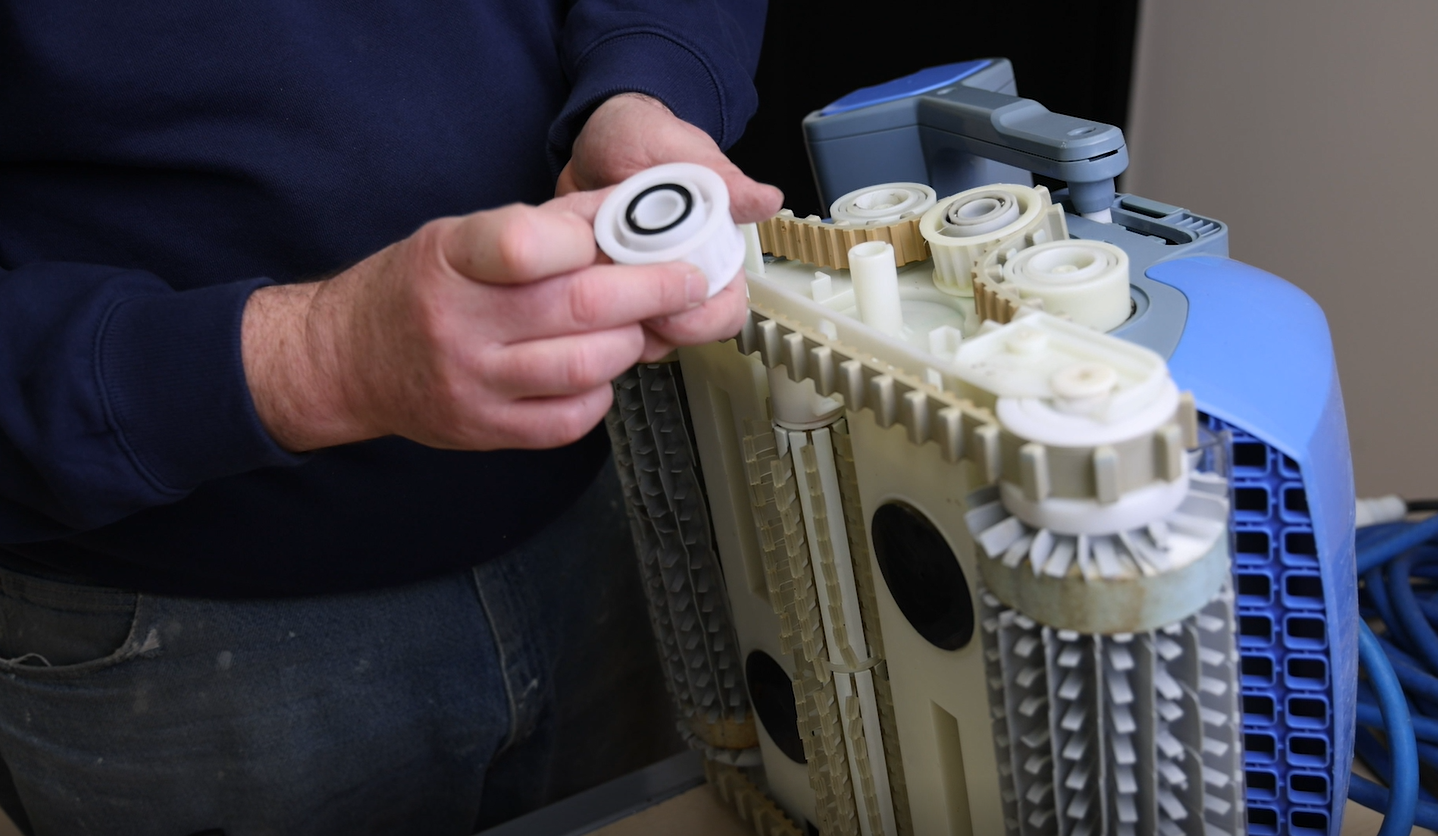
Take the exterior side plate off by unscrewing all four screws. You should then be able to find the lip of the side plate and firmly lift it off the side of the robot, exposing the gears, pulleys and more of the track.
The pulley is the wheel in the center. You can actually attempt to turn it and you may notice that it’s sluggish or doesn’t want to turn at all. If you compare that against a new pulley, this one will have a crisper sound, almost like a Matchbox car.
In order to change these gears and pulleys out, you will need to take the track off first. On the robot being used in this video, the pulley is jammed up with dirt and sand and isn’t moving very well. The pulleys are comparable to the bearings in your car tires which can also jam up and impede your tires from turning.
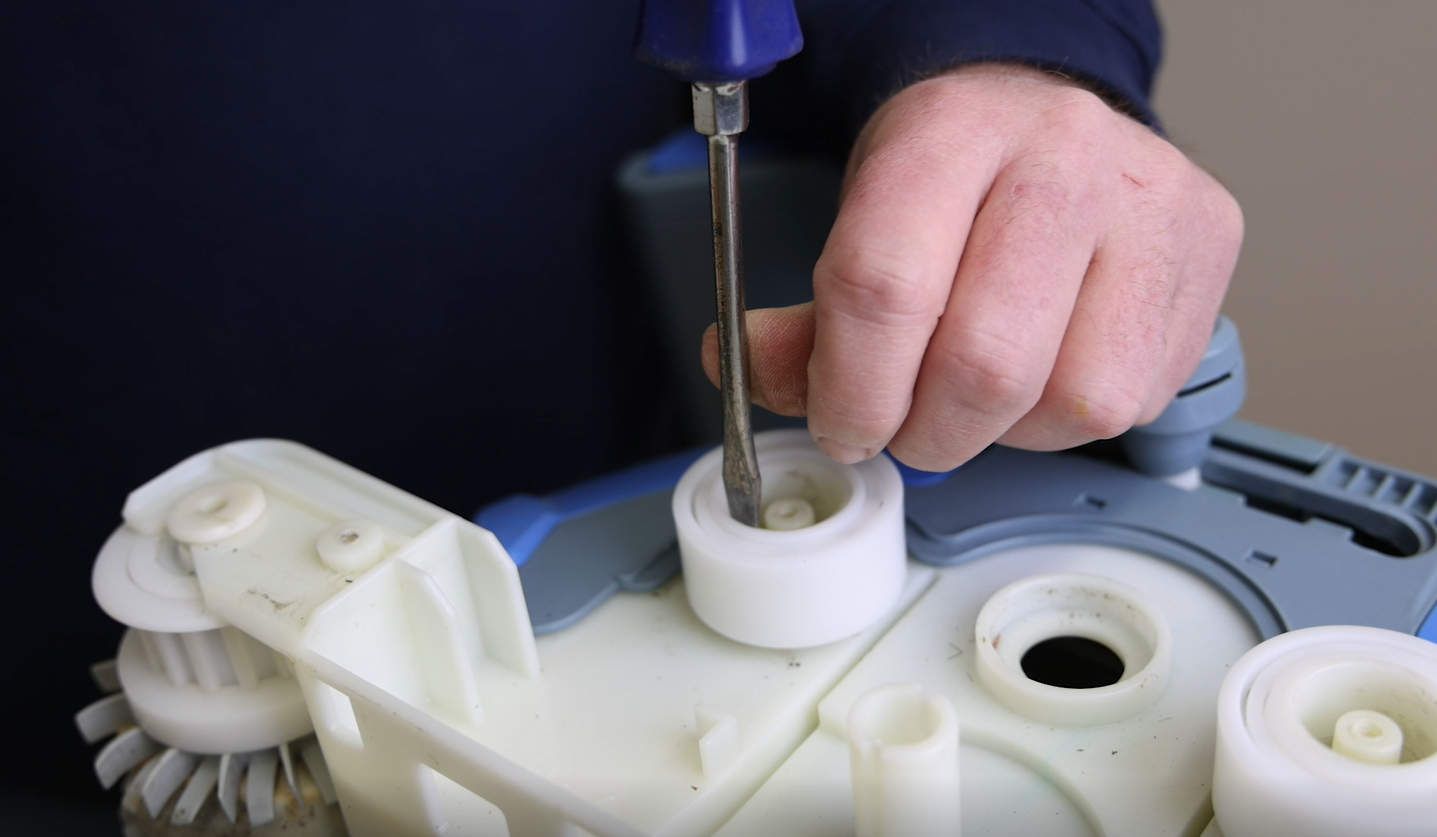
Next are the robot’s guide wheels. These can also get dirt and debris stuck in them and tend to lock in place. To help remove them, take a flat head screwdriver and lightly pry up from underneath the wheel at various points around each one. Be careful to not use too much force as this process is a gradual easing up of the stuck guide wheel. Once the wheels are free, it is a good practice to wipe the housing and everything off using a paper towel before installing the new replacement parts.
When you compare the older guide wheels and pulleys to the new ones you can actually see a discoloration indicative of lots of use.
To install the replacement guide wheels, first take notice of their being two sides. One side is a bit longer than the other and the wheel has four notches on it and if you look on the robot’s housing, there is 4 prongs where the notches on the wheel will align. If they are not lined up then the wheel will not fit properly.
The best thing to do is hold one and guide it straight down onto the housing. Once set-in place, the wheel should freely spin.
If you set the wheel down incorrectly then you will notice a lip where the wheel isn’t flush with the housing. In the video you can actually compare the first correctly placed wheel to the second which has been installed incorrectly and see the uneven gap. Our robot tech demonstrates the difference by putting a screwdriver into the space on the wheel and freely turning the correctly placed wheel but being unable to do this on the incorrectly placed wheel.
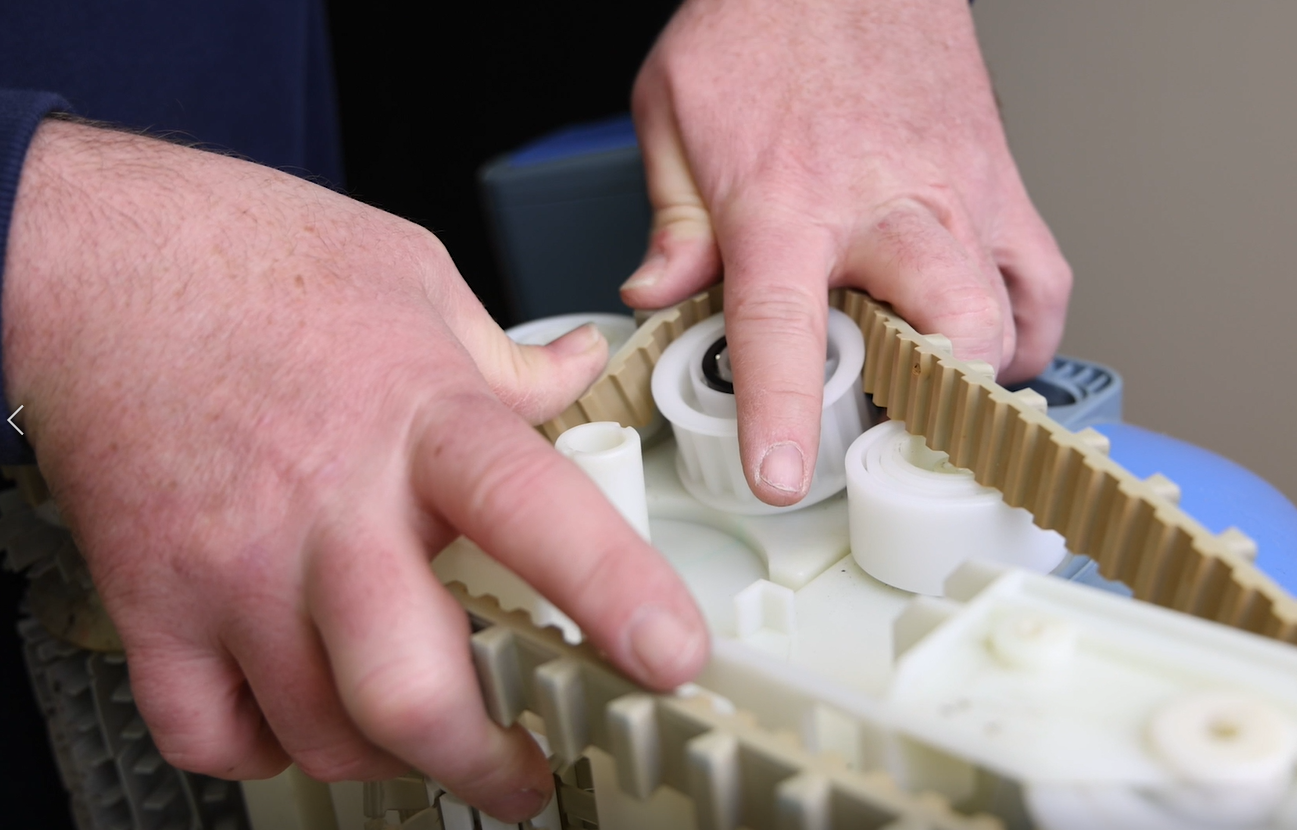
Some robots have one drive like this one does and others have two drives. The pulley is connected to a hex pin that comes out from the motor and housing. The hex pin only fits in the pulley one ways and connects in by simply pushing down. The presence of the hex pin will be on both sides for dual drives or just one side for robots with single drives. The number of drives corresponds to the functionality of the robot. It is important to not lose the hex pins and to make sure that they are re-attached when changing out parts.
Now it’s time to put the track back on. The track will be tight if it’s new but also because the gears are tight. The track goes over the top of the center pulley and under both guide wheels. Because everything you’re working with is now new, you may need to use the flat head screwdriver to gain leverage to install the track properly.
Lastly, it’s time to connect the side plate back on. Make sure to align the plate with both guide wheels and the pulley itself. In this video we show how the old pulley was attached and how the newer one will secure the side plate as well. At this point you’ll want to give a few light but firm taps to reconnect the side plate and if done correctly it will lock down tightly.
The side plate is able to take a good amount of stress so tapping on it is ok. Don’t forget to put all four screws back in as well.
After everything is back in place and the robot is operating you should notice a difference in mobility and efficiency. If the robot fails to move, you may have installed something incorrectly or there is debris stuck internally and you will want to investigate.
We are a Maytronics Certified Genuine Parts dealer. Genuine parts are what you always want to go with to keep your pool cleaner in its best condition. We have an on-staff robotic technician as well as a team of professionals who have many years of robotic pool cleaner experience. Our staff would be happy to help advise and answer any questions that you may have.