Published by Matt Fichera on 09/15/2020
How to Use a Brass Anchor Removal Kit
It seems like just about every year at the beginning and end of pool season that there’s always at least 1 or 2 brass safety anchors that give you trouble. They either won’t come up, won’t turn down, or just spin in the hole forever. Don’t let this issue lead to scraped up hands, and increased frustration. Be sure to watch our step by step video at the bottom of this blog.
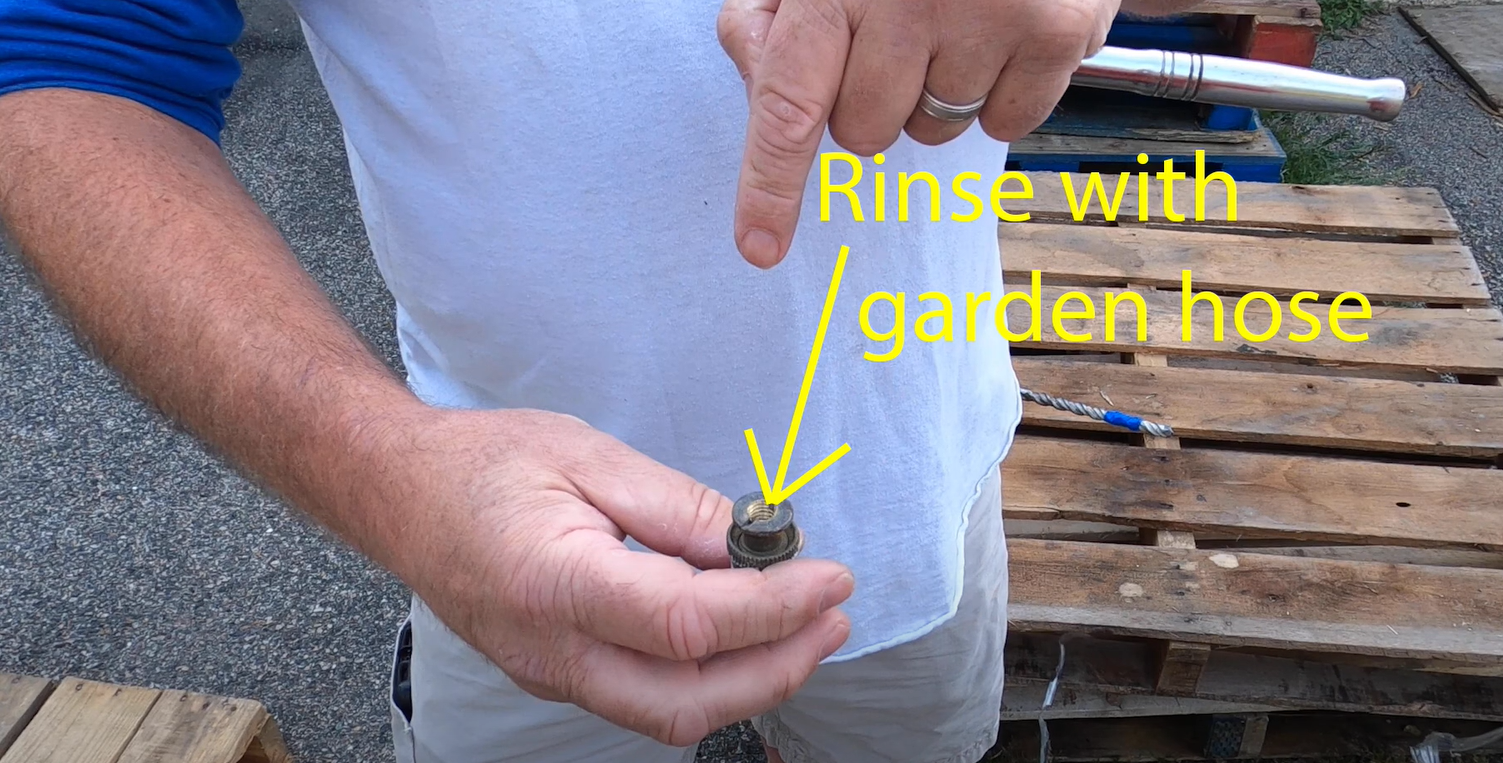
There are two components of a brass safety cover anchor, the body and the head. The threaded anchors not turning could be as simple as tiny bits of sand or concrete particles getting stuck in the threads. This can be avoided by using a garden house with a steady stream of water to clean the anchors head on. Try to do this both at least annually. Using oils and grease in these situations should be avoided as they are sticky and can actually bind particles up and work against what you are trying to do. After using the hose, work the stuck anchor back and forth on the threads with an Allan wrench, do this in increments at a time in an attempt to bring it up.
Sometimes you’ll encounter a grommet that just won’t move. Over time and from season to season, it’s not uncommon for these to get stuck in a certain position. In order to use the pool safety cover effectively you will need all of the anchors to function correctly so there are some steps that you can take to remedy this situation.
First off, we’re going to show you how to drill a new hole for a brass safety cover anchor.
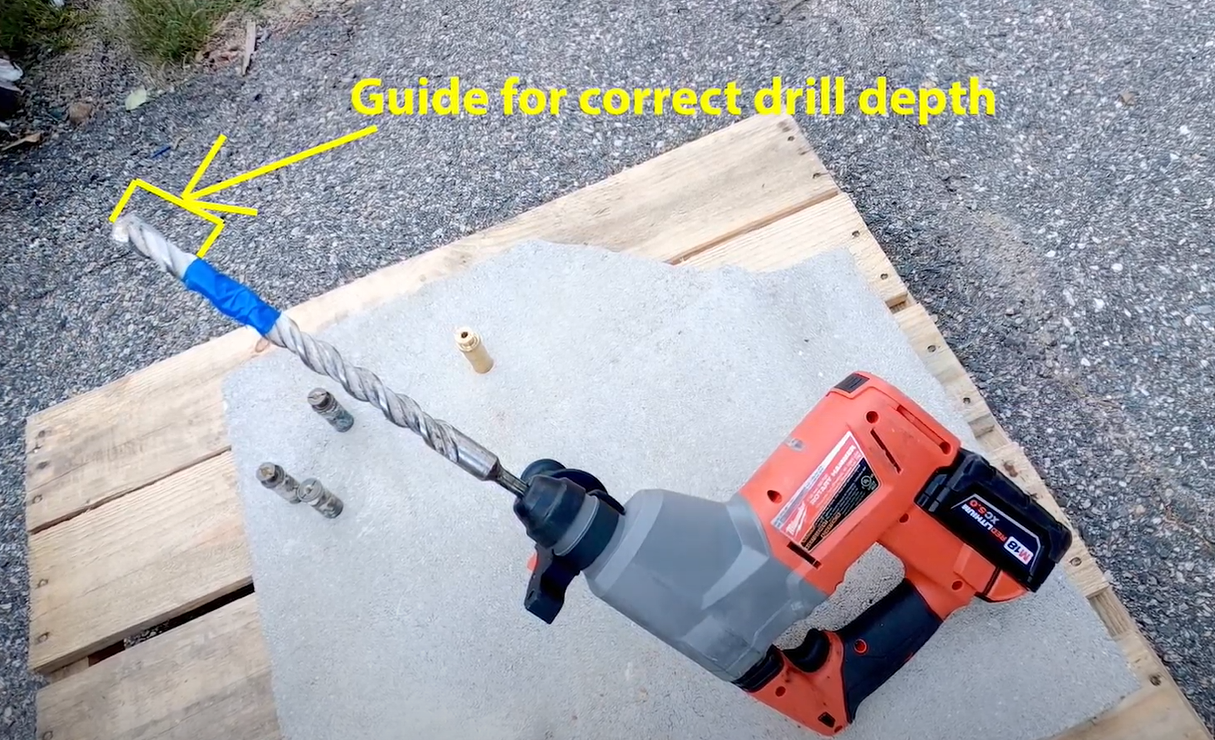
The tool that we are using is a hammer drill with a ¾ inch masonry bit attached. The blue tape on the drill bit is to mark the depth of the grommet so that you know when to stop drilling. Here you can see our comparison with going over a little bit being alright.
You don’t want to be too shallow however as the anchor will not lock in with the ribs that are at the top of it. These ribs help it bind into the concrete.
We will then drill into our test cement, assume that this is a cement patio near a pool. If the concrete is set “shallow” you may actually find that you have gone through it. This is not a big deal; it won’t hurt anything and the anchor will still lock in place.
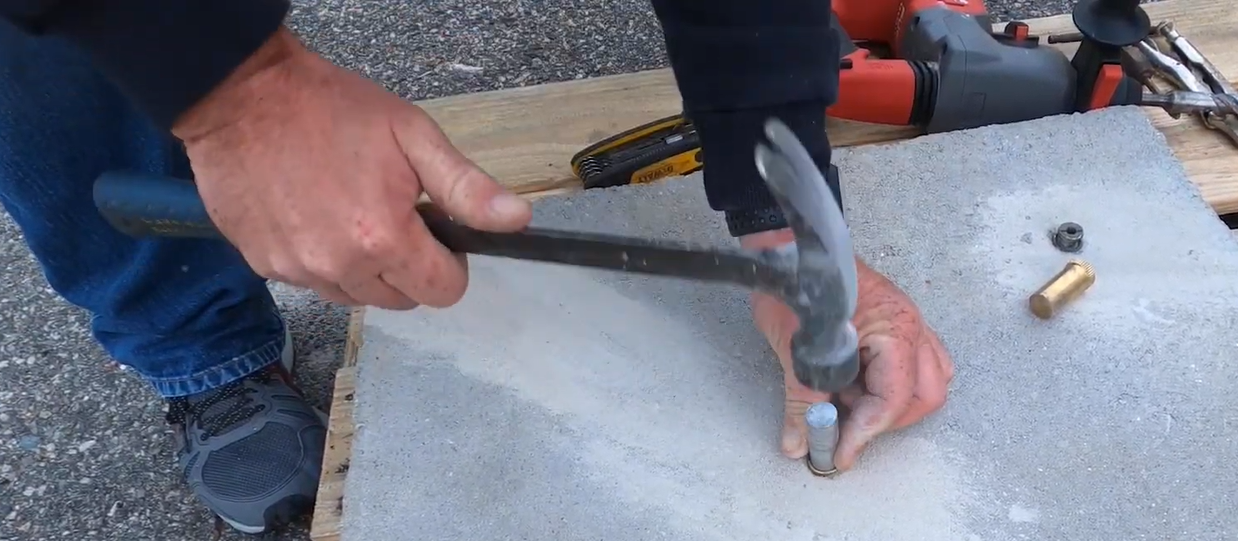
Setting up, take the anchor head out and put the anchor body in your newly drilled hole. Go ahead and place the tamping tool into the anchor body and using a hammer, hammer the anchor firmly into the cement just enough to catch the ribs located at the top into the cement. At this point the anchor body is somewhat smooth to the patio. You can then thread the anchor head into place by turning it clock-wise. Once this is secure you would be able to hook the spring from the pool safety cover onto your newly installed anchor.
To put this anchor down in the spring, it requires a quarter inch Allan wrench where you can spin the head clockwise making it flush with the cement patio during the months that the pool is open. To raise and use for the winter months, just spin in the opposite direction up to a point where you start to see the threads.
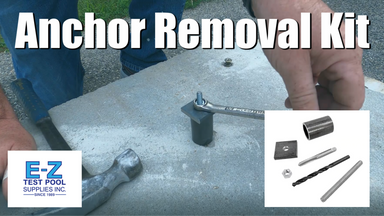
Many times, the top of the anchor head will get stripped out as the amount of wear builds up over the years. Luckily there’s a fix which doesn’t involve drilling a brand-new hole. This is where a Brass Anchor Removal Kit comes into play. These kits allow you to replace your stuck anchor in minutes.
The solution is to drill the anchor screw out of its stuck position. Using the drill bit included, drill down the center making sure that it’s long enough for the tap tool to reach through. At this point it’s opened up enough for you to run your tap into it.
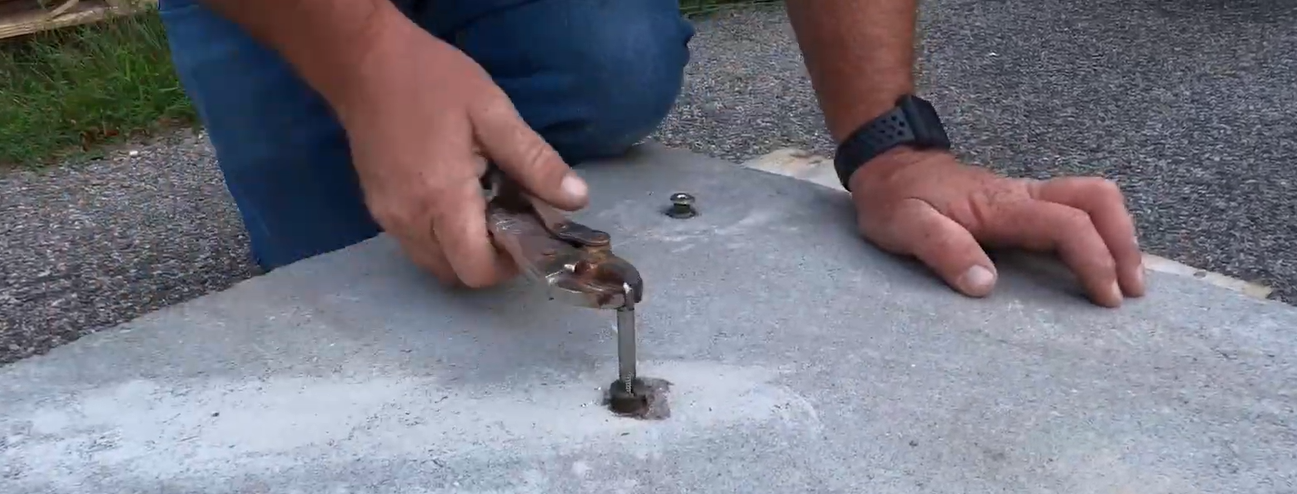
Place your tap tool into the newly drilled hole on the stuck anchor. At this point you really do need something that can firmly grab the top of the tap. In our case we’re going to use vice grips. These are not included in the kit but are great for getting the job done. You could also use a “T” wrench in this situation as well. Then you just start to tap into the opening putting firm pressure on the tapping tool.
What this action is doing here is creating new threads inside. You’ll want to turn it back and forth quite a bit. This step in the process is not a speedy one and can take time to cut the threads nicely so that you don’t bunch up the filings you’re cutting. Keep in mind that all grommets on safety covers are brass regardless of the manufacturer. During this process you are going to maneuver the tap down just over half of its length into the grommet. You will reach a point where it is bound and doesn’t want to move any further, this is when you’ll stop and back the tap all of the way out by spinning it counter-clockwise. Once the tap is removed you can see inside of the grommet that new threads were in fact cut.
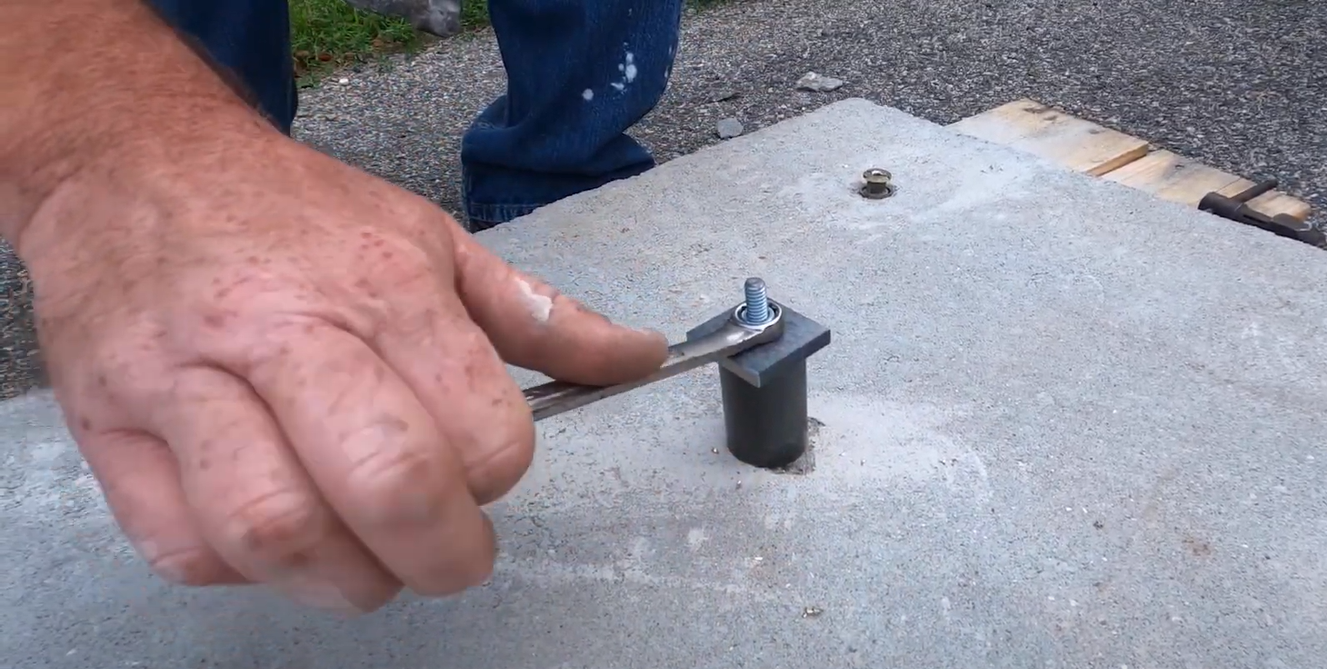
Our next step is to thread the bolt into your newly cut threads making sure that it bottoms out within the hole. Put the sleeve over it and then add the flat plate to allow something to grab against. Also add the nut and thread it all of the way down until it hits the plate ensuring that it’s snug using your hand.
Next, using a ½ inch wrench that is not included, use the closed end if you can and you are going to start to tighten. As you start to tighten, sometimes a hammer helps by tapping the sleeve and loosening it up against the patio. Then, you will continue to turn clockwise. It’s not unusual for this to be difficult where you have a hard time moving it hence the tapping on the side. You’ll reach a point where the anchor will work its way out of hole in the cement where you can completely remove it. As you can see, the anchor is attached to the end of the bolt in order for it to be successfully removed.
At this time, you can remove the tool from the anchor by spinning it counterclockwise completely off of the threads.
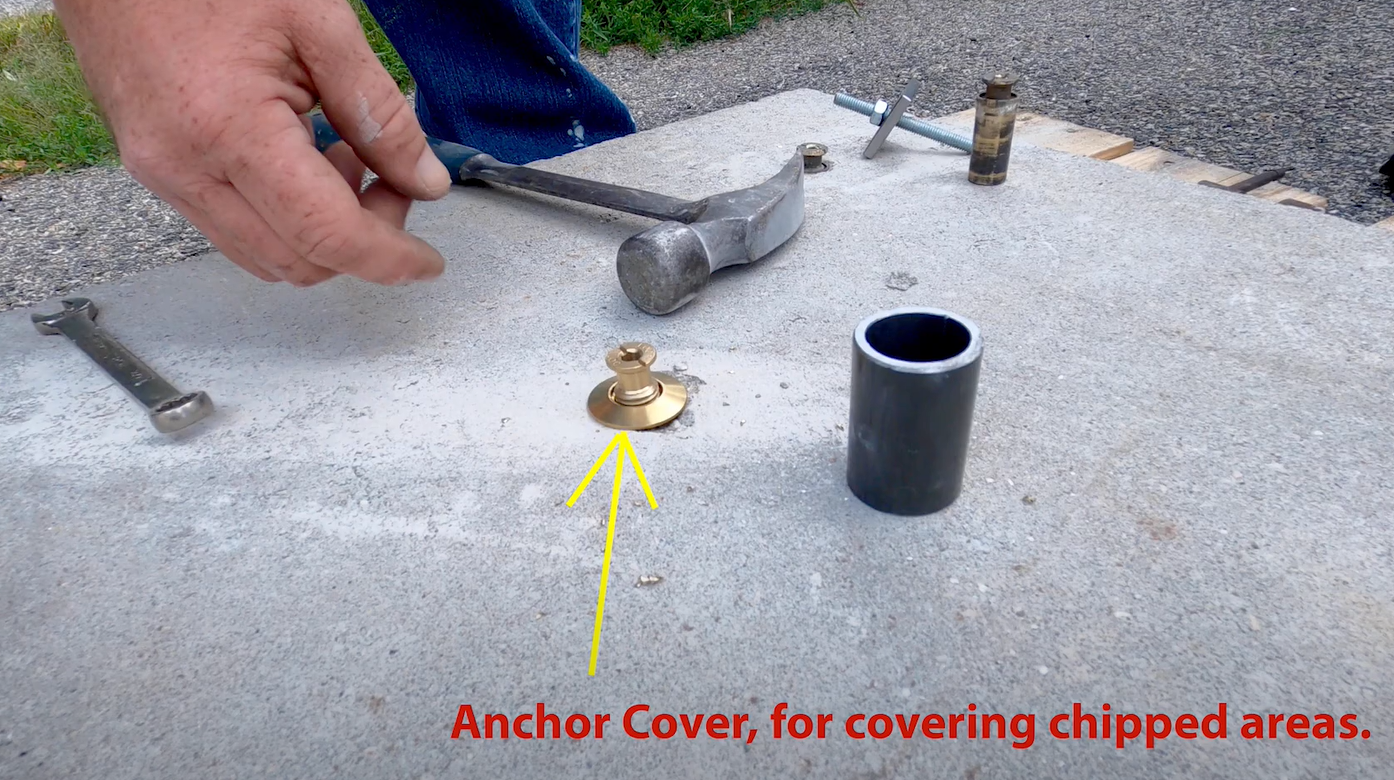
To set your new anchor in, place a new anchor into the hole and place the tamping tool into it. Once in a while the cement on the patio may chip around the area. This is alright and it happens based on use and wear. (Keep in mind that we are using a piece of older cement as an example) If the cement around the anchor has chipped or shown signs of wear, you can use a pool anchor cover for a better looking aesthetic and style. These are widely available including on our website and in our retail stores. You can then hammer in the new anchor by striking the tamping tool. Thread your new anchor and you are all set. When the anchor isn’t being used you can lower further and lock into place against the cover and patio.
Are Your Brass Safety Cover Anchors Giving You Trouble? Maybe they won’t come up, won’t turn down, or just spin in the hole forever? A Brass Anchor Removal Kit allows you to replace your stuck anchor in minutes!
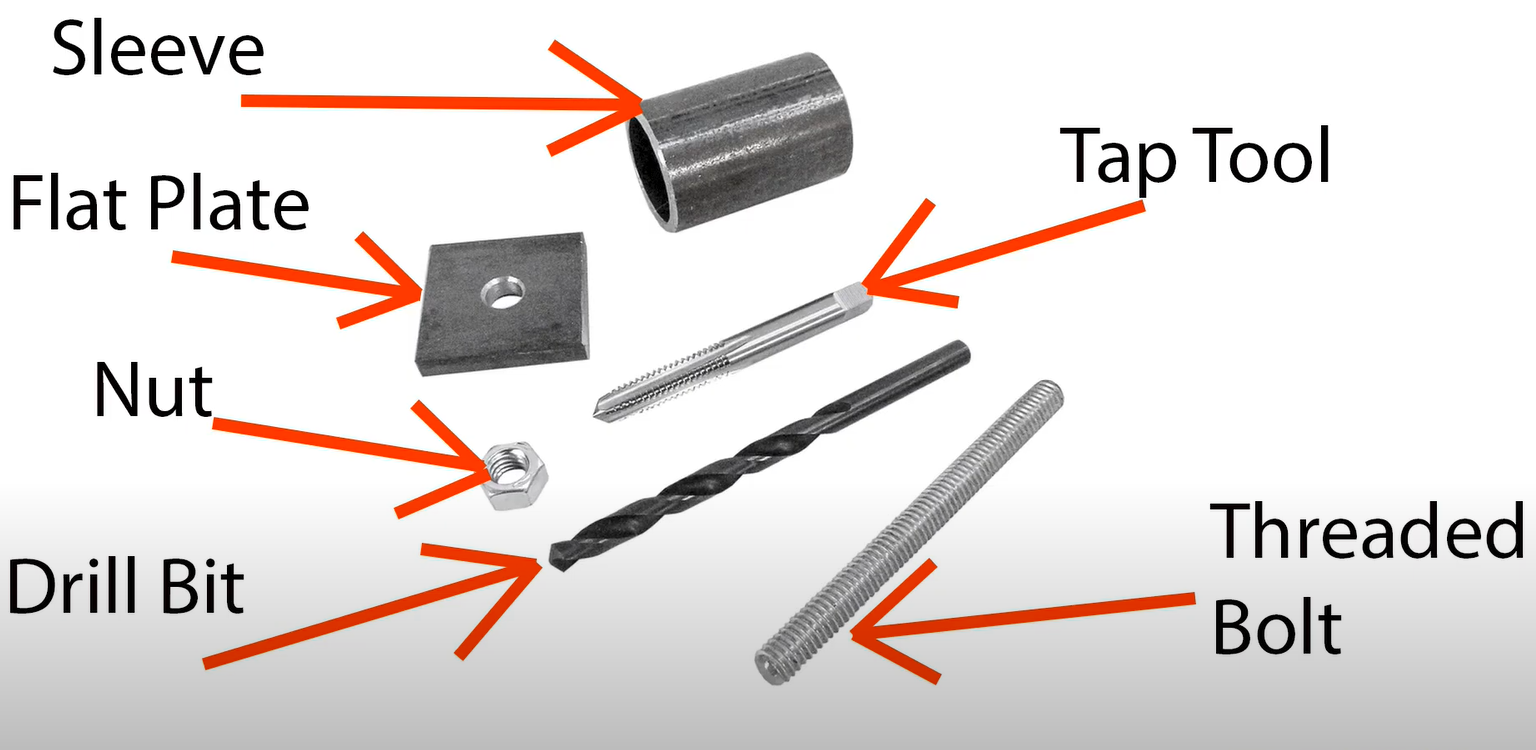
The Brass Anchor Removal Kit featured in our video comes with the following items:
-Drill Bit
-Tap Tool
-Threaded Bolt
-Sleeve
-Flat Plate
-Nut
This kit is available for purchase. Click on the 'Shop Now" button to go to the product page. We also have many of the items featured in this video available for sale individually in our Winter Items Section. Our team is happy to answer any questions.
Watch Our Step by Step Video on Brass Anchor Removal Kits:We also have a Loop-Loc Brass Anchor Pulling Kit available for purchase: here
Watch our Video on this as well:

