Published by Anthony on 08/10/2023
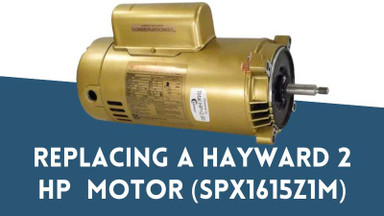
Replacing Your Hayward 2 HP Single Phase Threaded Shaft Motor (SPX1615Z1M)
Greetings, pool enthusiasts and DIY novices! Today, we dive into a realm of technical prowess as we unravel the steps to replace your Hayward 2 HP Single Phase Threaded Shaft Motor for Max-Flo/Super Pumps (SPX1615Z1M). Fear not, for we're your guides on this aquatic journey, ensuring that your pool pump operates at peak efficiency without breaking a sweat – or a wrench, for that matter!
Used On
- Hayward Super II SP3000X Pump
- Hayward Super Pump SP1600X Pump
- Hayward Super Pump SP2600X Pump
- Hayward MaxFlo SP1800X Pump
- Hayward MaxFlo SP2800X Pump
Tools of the Trade: What You'll Need
Before you embark on this DIY adventure, ensure your toolkit is well-stocked. You'll need a Phillips screwdriver, a flathead screwdriver, a pair of pliers, a socket wrench, and a strap wrench. Now, let's roll up our sleeves and dive in!
Step-by-Step Brilliance: A Novice's Guide
- Safety First: Always disconnect the power supply before any pool equipment tinkering. Safety goggles and gloves? An extra layer of precaution never hurt anyone!
- Drain and Disconnect: Release the pressure in your pool system and disconnect the electrical connections from the old motor.
- Liberate the Old Motor: Loosen and remove the motor placement bolts and the clamp band (if applicable). Gently maneuver the old motor out of the way, ensuring you don't strain any connected pipes or wires.
- Defuse the Diffuser and Back Plate: Gently pull the diffuser off and then turn the motor around to unscrew and remove the back electrical plate. Note: a nut driver might be easier than a flathead screwdriver. Slide the back electrical panel off.
- Get In There: Remove the capacitor to allow more direct access to the drive shaft. Use a wrench to secure the drive shaft and on the other side of the motor, you can start hand untightening the impeller. After the impeller is off, the seal plate should easily slide off. This will allow access to the housing plate bolts which you can now remove with your socket wrench.
- Seal the Deal: Now comes the crucial part – replacing the O-rings and shaft seals. This ensures a water-tight seal and extends the motor's life. Make sure not to touch the ceramic part of the seal shaft when applying silicone lubricant and placing the shaft seal on the seal plate. Remember, the devil's in the details, so pay close attention to this step!
- Impeller Conundrum: Replacing the impeller is optional, but if your old one is showing signs of wear, it's a worthy consideration. A strap wrench will be your trusty sidekick in this endeavor.
- Embrace the New: Install the new motor by reversing the steps you followed to remove the old one. Make sure the motor is snugly in place, and those bolts are tightened just right.
Time is on Your Side: How Long Will This Take?
With the right tools and a sprinkle of DIY magic, the process usually takes around 1 to 2 hours. Think about it – that's just a couple of episodes of your favorite show. And what's more? You're saving precious dollars by doing it yourself!
Expertise at Your Fingertips
We understand that embarking on this DIY journey might raise a few questions. Fret not! At EZ Pool & Spa Supply, our dedicated support agents are here to address any concerns or uncertainties you may have. Just dial 877-209-7773, and we'll be your poolside partners.
Protection Plans: Your Pool's Best Friends
As you gear up for this DIY endeavor, consider safeguarding your investment with our Extend Protection Plan. Maximize the life of your new motor and ensure years of reliable performance. And don't forget Extend Shipping Protection – a safety net against package mishaps.
In Closing: A Poolside Promise
We thank you for taking the plunge into the world of DIY pool maintenance. With EZ Pool & Spa Supply by your side, your pool pump will be humming along like a champion in no time. So go ahead, embrace the power of knowledge and take charge of your pool paradise. Until next time, happy swimming and even happier DIY-ing!


